Purpose & Scope
The HB.08.00 MEP Rough checklist helps production homebuilders verify that mechanical, electrical, plumbing, low-voltage, gas, fireplace, and related equipment rough-in conditions are ready before concealment. This checklist addresses routing, spacing, support, protection, penetrations, firestopping readiness, pressure and continuity evidence, inspection release, photo documentation, and coordination with framing, insulation, and drywall sequencing.
For a production builder, MEP rough is a high-risk no-cover stage. Once insulation and drywall begin, rough-in conditions that were easy to see become concealed behind finished assemblies. A drain-slope conflict can become a fixture or service callback. A missing nail plate can become a damaged pipe or cable. An inaccessible duct or equipment rough-in can become a comfort, noise, or service problem. A low-voltage routing conflict can become a device failure. Missing firestopping or unverified fireplace clearance can become a failed inspection and life-safety exposure.
The checklist gives the superintendent, QA team, and trade partners a structured way to confirm that MEP rough-in work is installed to the current lot documents, protected from damage, coordinated with framing and blocking, tested where required, released by the applicable municipal or third-party inspection process, photographed before cover, and ready to advance without carrying concealed quality risk into insulation or drywall.
Checklist Preview
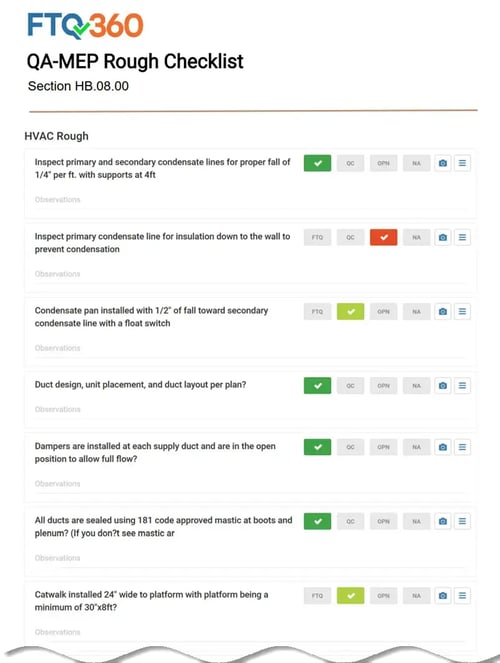

What the Checklist Covers
This checklist begins with the task-specific information needed to evaluate MEP rough readiness. Approved mechanical, electrical, plumbing, low-voltage, gas, fireplace, framing, and plan-type drawings should be available for the lot, with the current revision recorded before rough-in starts. Manufacturer installation instructions should be available where applicable for equipment, direct-vent units, appliances, fixtures, valves, panels, boxes, controls, and related rough-in components.
The checklist then confirms that the trade sequence is coordinated before work becomes concealed. Plumbing, HVAC, electrical, low-voltage, gas, fireplace, framing, and fire/life-safety responsibilities should be aligned with framing, blocking, firestopping, insulation, municipal inspection, and drywall schedules. The release rule is simple: no insulation or drywall should cover work when required tests, firestopping, protection plates, clearance evidence, municipal release, or correction closure is missing.
The physical inspection reviews rough-in conditions by room, area, and system. Plumbing rough is checked for plan location, routing, support, protection, pressure or test status, drain slope, and no conflict with framing or insulation. HVAC rough is reviewed for duct and equipment location, support, clearances, boot and register locations, return paths, venting, condensate routing, and access. Electrical rough is checked for box height and location, cable routing, protection plates, panel or home-run identification, smoke and carbon monoxide rough locations, and required separations. Low-voltage and controls rough are reviewed separately for device locations, wiring protection, labeling, bend protection, and separation from line-voltage work.
The checklist also includes framing and life-safety interfaces that affect MEP release. Bored or notched members, truss restrictions, required blocking, nail plates, draftstopping, fireblocking, fire caulk, fireplace clearances, penetration protections, gas stub locations, control wiring, vent termination, and direct-vent installation requirements should be verified before cover. Structural or life-safety conflicts should stop advancement until corrected and reinspected.
The checklist closes with release documentation. Internal rough-in review should confirm that plumbing, HVAC, electrical, low-voltage, gas, fireplace, firestopping, and framing-protection corrections are closed before municipal or third-party inspection where required. Pressure, continuity, operational, or inspection records should be attached by trade, with instrument ID or inspection record number where applicable. The pre-cover photo set should capture concealed wall, ceiling, chase, fireplace, penetration, and equipment rough-in conditions by lot, room, and system before insulation or drywall begins.
Why This Stage Matters for Production Builders
MEP rough matters because it is one of the last points where multiple critical systems are still visible at the same time. The builder can still see the relationship between pipes, ducts, cables, boxes, equipment, vents, chases, framing penetrations, fireblocking, and future drywall. After cover, those same conditions can only be confirmed through records, selective access, destructive rework, or later failure.
The production risk is multiplied by repetition. Production builders repeat plans, option packages, equipment locations, trade partners, crews, rough-in methods, release sequences, and inspection expectations. When the first rough-in method is right, that repetition supports quality and schedule flow. When the first method is wrong, the same concealed defect can spread across several lots before anyone sees the pattern.
HB.08.00 should therefore be treated as a stage-release control, not a routine trade-completion walk. The lot should not advance because rough-in crews are finished. It should advance because rough-in conditions are visible, protected, coordinated, documented, tested where required, externally released where applicable, and closed with correction evidence. A disciplined MEP rough release protects cycle time, reduces failed inspections, prevents destructive rework, strengthens trade partner accountability, and lowers the risk that concealed conditions become closing delays, service callbacks, warranty claims, or homeowner-confidence problems later.
Common Failure Modes & Risk Prevention
Plumbing rough location or slope conflicts often begin when the approved plan is not followed or when trade coordination is missed. The result can be drywall cuts, fixture conflicts, drain performance issues, service callbacks, or rework after cover. Prevention starts with a first-area rough-in check for routing, slope, support, protection, fixture location, and test readiness. Photo and test evidence should be captured before the same rough-in approach repeats through additional rooms or lots.
HVAC duct, vent, or equipment rough-in failures often come from routing that was not coordinated with framing, other trades, service access, or equipment clearances. The consequence can be poor performance, noise, blocked service access, condensate problems, or rework after drywall. Prevention depends on checking the first HVAC rough-in area for duct and equipment location, support, clearance, venting, condensate routing, return paths, boot and register locations, and access before the system is covered.
Electrical rough failures usually involve boxes, cables, panel circuits, smoke or carbon monoxide rough locations, or missing protection plates. These failures can create failed inspections, safety risk, rework, and homeowner-facing defects later. Prevention depends on room-by-room rough-in verification. Box locations, cable routing, cable protection, panel or home-run identification, device rough locations, and required separations should be photographed before cover.
Low-voltage and control wiring failures often occur when responsibility is unclear, installation is late, routing conflicts with other systems, or separation from line-voltage work is not maintained. The consequence can be device failure, troubleshooting time, and warranty callback risk. Prevention depends on treating low-voltage and controls as their own rough-in scope. Data, security, controls, doorbell, thermostat, and media wiring should be routed, protected, labeled, and photographed before the wall is closed.
Firestopping, fireblocking, fireplace clearance, and penetration-protection failures are no-cover issues because they affect inspection release and life-safety exposure. They often occur when rough-in work is completed without a separate closeout of penetration conditions. Prevention depends on a pre-cover firestopping gate. Draftstopping, fire caulk, fireblocking, fireplace clearances, direct-vent requirements, control wiring, combustible clearances, and penetration protections should be documented before insulation or drywall proceeds.
Framing interface failures can also stop release. Bored or notched members, truss restrictions, missing blocking, missing nail plates, and unapproved structural modifications can be created by MEP routing. Prevention depends on reviewing framing penetrations, boring and notching limits, clearance zones, nail-plate needs, and required blocking with responsible trades before work is covered. Structural or life-safety conflicts should trigger stop-work until corrected or approved through the builder’s required process.
Before Work Advances
Before MEP rough-in can be evaluated, the builder needs the correct documents, trade sequence, testing expectations, and evidence plan in place. Approved mechanical, electrical, plumbing, low-voltage, gas, fireplace, framing, and plan-type drawings should match the lot being inspected. The current revision should be recorded before rough-in begins so the inspection does not validate outdated routing, box locations, fixture locations, equipment placement, or option conditions.
Manufacturer installation instructions should be available where applicable. Direct-vent fireplace units, appliances, equipment, controls, fixtures, panels, valves, boxes, and related rough-in components should be checked against the applicable instructions and lot requirements. Reference photos, installation documents, or submittal evidence should be retained when the condition affects release.
Trade partner responsibilities should be separated before the work advances. Plumbing responsibility includes supply, waste, vent, gas, fixture rough, supports, protection, pressure or test readiness, and drain slope. HVAC responsibility includes duct runs, boots, returns, venting, condensate, equipment clearances, supports, and service access. Electrical responsibility includes boxes, home runs, cable protection, panel identification, smoke and carbon monoxide rough locations, exterior or device rough, and required separations. Low-voltage responsibility includes data, security, controls, doorbell, thermostat, and media wiring. Framing and interface responsibility includes bored or notched members, truss restrictions, blocking, nail plates, and protection at penetrations. Fire and life-safety responsibility includes fireblocking, draftstopping, fire caulk, fireplace clearances, and penetration protections.
The inspection sequence should also be clear. Required rough-in test methods, inspection records, pressure or continuity checks, and photo-evidence locations should be assigned by trade before work starts. Municipal rough-in inspection requirements and third-party energy-rating prerequisites should be coordinated with the builder’s internal release process. The lot is not ready to advance when required testing, inspection release, correction closure, or pre-cover photo evidence has not been planned and assigned.
Job-Ready Verification
Job-ready verification confirms that prerequisite work and handoff conditions are acceptable before the current stage proceeds. For HB.08.00, this means the builder verifies representative plumbing, HVAC, electrical, low-voltage, gas, fireplace, firestopping, and framing-interface conditions before the rough-in method repeats across the lot or release group.
The first plumbing rough-in area should be checked for routing, slope, support, protection, test readiness, and fixture location against the approved plan. The record should include photos and test evidence where required before the trade continues the same method through additional areas. If the first area shows routing conflict, support gaps, protection gaps, or test-readiness issues, the issue should be corrected before it repeats.
The first HVAC rough-in area should be checked for duct and equipment location, support, clearance, venting, condensate routing, and access. Location-tagged photos should confirm the condition before continuation. If the first rough-in area blocks service access, conflicts with framing, lacks support, or creates a clearance issue, downstream work should not proceed on the assumption that it will be corrected later.
The first electrical rough-in wall or room should be checked for box locations, cable routing, protection plates, panel or home-run identification, and required separations. Photo evidence should confirm that boxes, wires, supports, protection, and identification are ready before cover. The first low-voltage or control rough-in should be checked separately for routing, box locations, bend protection, separation from line-voltage work, and labeling.
The first gas, fireplace, or direct-vent rough-in should be checked against manufacturer instructions, clearance requirements, blocking, control wiring, and vent termination conditions. Fireplace and direct-vent locations should verify that blocking is present for fireplace and mantel installation, the vent cover is level, plumb, square, and secured, the gas stub and electrical box locations are marked, the unit is installed level, plumb, square, centered, and at the appropriate depth for the surround and final trim-out, and required combustible clearance is verified. Unverified clearance, missing firestopping, or incomplete life-safety conditions should stop advancement until corrected.
Job-ready verification also checks the builder’s inspection-release logic. Internal rough readiness, municipal inspection requirements, third-party prerequisites, and correction closure should be aligned before the lot moves deeper into the no-cover sequence. If the first inspection result identifies a recurring problem, comparable rooms, systems, lots, or release groups should be reviewed before insulation or drywall scheduling proceeds.
Progress Preview
During active MEP rough-in work, progress preview checks help the builder identify issues while the systems are still visible and easier to correct. These checks are useful because they reduce surprises at the final stage-release decision, but they do not authorize insulation or drywall by themselves.
As plumbing rough progresses, each room or area should be checked for plan location, routing, support, protection, drain slope, fixture rough, gas rough where applicable, and test status. Pipes should not conflict with framing, insulation, or future finish conditions. Missing protection, unsupported routing, unverified test status, or fixture-location conflict should be assigned to the responsible trade partner, corrected, photographed, and reinspected before cover.
As HVAC rough progresses, duct runs, boots, returns, venting, condensate routing, equipment clearances, supports, and service access should be verified by system and area. Photos should document equipment rough, venting, boot and register locations, return paths, clearance conditions, and areas that will become concealed. Inaccessible rough-in, missing support, clearance concerns, or routing conflicts should not be covered.
As electrical rough progresses, box height and location, cable routing, cable support, protection plates, panel identification, home runs, smoke and carbon monoxide rough locations, exterior or device rough, and required separations should be verified by room. The photo record should show concealed conditions before insulation or drywall. Missing protection plates, unprotected wiring, mislocated boxes, or unverified panel identification should stop cover in the affected area.
Low-voltage and controls should be checked separately as work progresses. Data, security, controls, doorbell, thermostat, and media wiring should be routed, protected, labeled, and separated from line-voltage work. Routing photos and device-location photos should be captured before cover so future service questions do not rely on memory.
Fireblocking, draftstopping, fire caulk, fireplace clearances, direct-vent details, penetration protections, nail plates, and framing-interface corrections should be verified continuously as trade rough-ins are completed. The builder should not wait for the final walk to discover that a concealed penetration or life-safety condition is incomplete. Progress preview also helps identify repeating patterns. If the same routing, support, clearance, protection, firestopping, box-location, or test-status failure appears across rooms, plan types, lots, trade partners, or crews, the builder can correct the method before the defect becomes a concealed production pattern.
Stage Release & MEP Rough-In Cover Readiness
Stage release is the governing inspection event for HB.08.00. The lot is ready for insulation or drywall cover only when plumbing, HVAC, electrical, low-voltage, gas, fireplace, firestopping, and framing-protection conditions have passed, required tests and inspection releases are documented, failed items are corrected, and the inspection record supports advancement.
The final rough-in release record should confirm that plumbing rough-in is complete by room and area. Supply, waste, vent, gas, fixture rough, supports, protection, drain slope, and pressure or test readiness should be verified. Required test records, pressure-test logs, inspection reports, photos, and correction evidence should be attached before any plumbing rough-in condition is covered.
HVAC release should confirm duct runs, boots, returns, venting, condensate, equipment clearances, supports, service access, and rough equipment conditions by system and area. Equipment access should remain clear. Venting should be coordinated. Condensate routing should be verified. Boots, registers, return paths, and duct routing should be documented before insulation or drywall closes the condition.
Electrical release should confirm that boxes, home runs, cable protection, panel identification, smoke and carbon monoxide rough locations, exterior or device rough, and required separations are verified by room. Protective plates should be installed where required. Cables should be supported and protected. Panel or home-run identification should be clear enough to support inspection, finish work, and future service.
Low-voltage and controls release should confirm that data, security, controls, doorbell, thermostat, and media wiring are routed, protected, labeled, and separated from line-voltage work. Routing and device-location photos should be complete before cover. Open conflicts should be corrected and reinspected before the affected wall, ceiling, chase, or equipment area is closed.
Gas, fireplace, direct-vent, and fire/life-safety release should confirm manufacturer-instruction compliance, blocking, control wiring, vent termination, combustible clearance, fireblocking, draftstopping, fire caulk, and penetration protection. The rough-in record should show fireplace and direct-vent installed conditions, required clearances, control wiring, gas stub and electrical box locations, and firestopping or fireblocking evidence before drywall.
Municipal and third-party release status should be recorded separately from the builder’s internal pass status. Internal rough pass, municipal rough inspection, energy-rater prerequisites where applicable, and required correction closure should each have their own evidence. A failed external inspection should require verified correction before advancement. No insulation or drywall should proceed when required tests, firestopping, protection plates, clearance evidence, municipal release, third-party release, or correction closure is missing.
If a checkpoint fails, the record should identify the room or location, system, failed condition, responsible trade partner, correction owner, correction evidence, and reinspection result. Any failure that affects concealed work, safety, inspection release, service access, system performance, or homeowner-facing reliability should stop cover in the affected area until corrected.
For production builders, the completed release record becomes trend data. When failures are tracked by community, lot, plan type, room, system, trade partner, crew, defect category, severity, recurrence, inspection status, and correction status, the builder can see whether an MEP rough issue is isolated or beginning to repeat. That visibility helps prevent one concealed rough-in defect from becoming a broader cycle-time, warranty, or homeowner-confidence problem.
References and Related Specification Systems
References
Primary reference inputs for this checklist include approved mechanical, electrical, plumbing, low-voltage, gas, fireplace, framing, and plan-type drawings for the lot and current revision. Manufacturer installation instructions should be verified for direct-vent fireplace units, appliances, equipment, controls, fixtures, panels, valves, boxes, and related rough-in components.
Project-adopted residential building, mechanical, plumbing, electrical, fuel gas, fire/life-safety, and energy code requirements may apply, but jurisdictional edition and applicability should be confirmed before treating any reference as controlling. Municipal rough-in inspection requirements, third-party energy-rating prerequisites, trade test records, pressure-test logs, continuity records, inspection reports, and pre-cover photo evidence should be used as part of the rough-in release package where applicable.
Related Specification Systems
Related specification systems may include Division 22 plumbing, Division 23 HVAC, Division 26 electrical, Division 27 low-voltage and communications, firestopping, draftstopping, gas rough-in, fireplace and direct-vent equipment, and pre-cover inspection requirements. UFGS, VA Master, NMS, and RIB SpecLink equivalents should be verified against actual project requirements before being used. The Homebuilder checklist does not assume a single exact commercial specification counterpart. Applicability should always be confirmed against the builder’s standards, jurisdiction, project documents, and lot-specific conditions.
FTQ360 Inspection & QAQC Platform
FTQ360 helps production builders manage MEP rough inspections as repeatable stage-release controls. Inspectors can complete the HB.08.00 checklist on phones or tablets, tag conditions by room, area, and system, attach pre-cover photo evidence, record pressure or continuity evidence, identify failed checkpoints, assign responsible trade partners, document correction closure, track municipal or third-party release status, and capture superintendent or QA signoff before insulation or drywall begins.
Required fields, photo evidence, correction assignments, reinspection status, test records, and release decisions help prevent cover decisions from depending on memory, verbal trade updates, or assumed inspection results. Time stamps and user stamps show who verified the lot and when. Community, lot, plan type, room, system, trade partner, crew, defect category, severity, recurrence, inspection status, and correction status make recurring MEP rough issues easier to see before they become concealed production patterns.
For homebuilders, the value is not simply replacing a paper rough-in checklist. The value is knowing which lots passed, which systems failed, which tests and releases are documented, which corrections remain open, which trade partners own the work, which homes are ready for cover, and where recurring concealed-risk conditions are emerging before they affect cycle time, closing readiness, warranty exposure, or homeowner confidence.
How to Use the Free Template
For the fastest digital setup, open FTQ360 Checklist Setup, go to the Library, search for HB.08.00 MEP Rough, and clone the checklist.
Then tailor the checkpoint templates to your builder standards, plan types, option workflow, MEP rough sequence, system naming conventions, trade responsibilities, municipal inspection sequence, third-party release process, required photo evidence, test record requirements, and no-cover release rules.
If your team still uses paper in selected areas, the checklist can also support field markup and later transcription. Paper can capture observations, but it cannot enforce required fields, correction ownership, photo evidence, reinspection status, test documentation, municipal or third-party release tracking, or recurring-defect visibility the way a digital QAQC workflow can.
For step-by-step help, visit support.ftq360.com.
FTQ360 inspection and QAQC software helps homebuilders verify job readiness, make disciplined MEP rough stage-release decisions, prevent repeated concealed defects, strengthen trade partner accountability, and protect closing readiness through consistent field evidence.
MasterSpec® and MasterFormat® are registered trademarks. This blog references related specification systems for clarity only and does not reproduce proprietary content. Copyright FTQ360.
